GitHub Actions
Smoothness 2023/2/8 GitHubGitHub Actions
本文介绍如何使用GitHub的Actions去实现代码合并自动部署。
# 使用GitHub Actions实现自动部署
# 介绍
Github Actions是 Github 提供的免费自动化构建实现,特别适用于持续集成和持续交付的场景,它具备自动化完成许多不同任务的能力,例如构建、测试和部署等等。
# 概念
- 在进行操作前,先对
Github Actions基础知识进行补充,具体可查看 GitHub Actions 入门教程阮一峰 (opens new window) - 可以在 GitHub Marketplace · Actions to improve your workflow (opens new window) 中找到所有的 Actions。
# 开始
在项目根目录创建
.github/workflows文件夹,并且在workflows内生成一个workflow文件,名字可以随便取,这个示例是pages.yml。pages.yml
name: BlogPages


on:
  pull_request:
    branches: [ main ]

jobs:
  build: # 自定义名称
    runs-on: ubuntu-latest # 运行在虚拟机环境ubuntu-latest

    strategy:
      matrix:
        node-version: [14.x]

    steps:
      - name: Checkout # 步骤1
        uses: actions/checkout@v1 # 使用的动作。格式:userName/repoName。作用:检出仓库,获取源码。 官方actions库:https://github.com/actions

      - name: Use Node.js ${{ matrix.node-version }} # 步骤2
        uses: actions/setup-node@v1 # 作用:安装nodejs
        with:
          node-version: ${{ matrix.node-version }} # 版本

      - name: Build-and-deploy # 步骤3
        env:
          CLIENT_ID: ${{ secrets.CLIENT_ID }}
          CLIENT_SECRET_ID: ${{ secrets.CLIENT_SECRET_ID }}
        run: |
          echo '获取仓库基本信息'
          remote_addr=`git remote get-url --push origin`
          commit_info=`git describe --all --always --long`
          user_name='GGupzHH'
          user_email=`git log -1 --pretty=format:'%ae'`
          deploy_branch=blog

          echo ${remote_addr}
          echo ${commit_info}
          echo ${deploy_branch}

          yarn
          yarn build
          cd docs/.vuepress/dist
          git config --global init.defaultBranch $deploy_branch
          git init
          echo ${user_name}
          echo ${user_email}

          git config user.name ${user_name}
          git config user.email ${user_email}
          echo '设置git用户信息完成'

          git add -A
          git commit -m "auto deploy, $commit_info"
          remote_addr=`echo $remote_addr | awk -F'://' '{print $2}'`
          remote_addr=https://${user_name}:${{secrets.BLOG_TOKEN}}@${remote_addr}
          echo ${remote_addr}
          git remote add origin ${remote_addr}
          git push origin HEAD:$deploy_branch --force # 推送到github $deploy_branch分支
1
2
3
4
5
6
7
8
9
10
11
12
13
14
15
16
17
18
19
20
21
22
23
24
25
26
27
28
29
30
31
32
33
34
35
36
37
38
39
40
41
42
43
44
45
46
47
48
49
50
51
52
53
54
55
56
57
58
59
60
61上面这个 workflow 文件的要点如下
- 整个流程在
main分支发生pull_request事件时触发。 - 只有一个job,运行在虚拟机环境ubuntu-latest。
- 设置环境变量
CLIENT_ID和CLIENT_SECRET_ID搭配Vssue (opens new window)登录GitHub账号进行评论。 - 首先获取当前仓库基本信息并且设置git用户名和邮箱。
- 安装依赖和构建打包。
- 进入到打包的目录,初始化git,设置分支和用户信息。
- 将代码暂存提交,设置远程代码仓库。
- 推送代码。
- 整个流程在
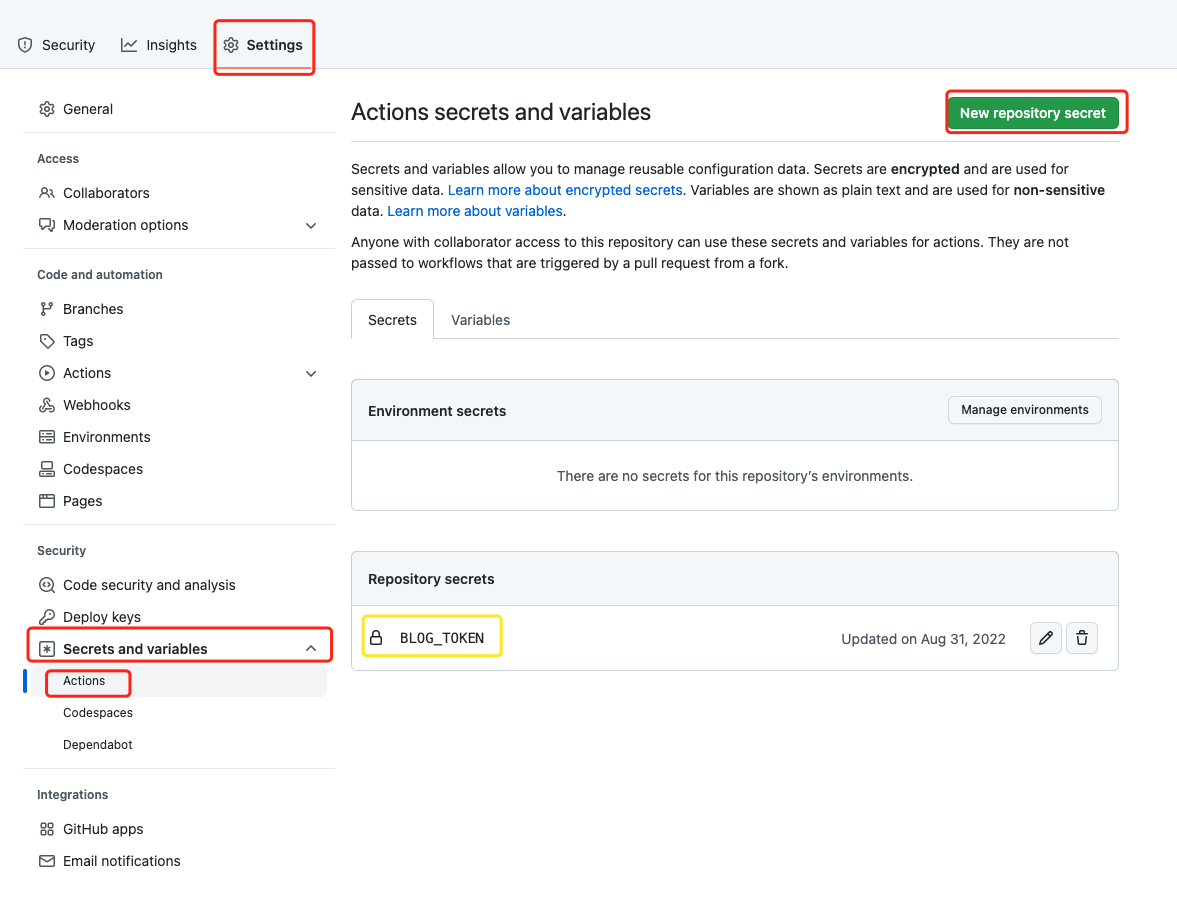
设置自己的
TOKENtoken 只会在生成的时候显示一次,如需要再次显示,则可以点击,但使用此令牌的任何脚本或应用程序都需要更新!不过记得权限过期以及勾选上 workflow。
